Wednesday, May 28, 2008

Cover your windows!

OK, on my list of easiest, "thriftiest" ways to decorate your home...window treatments are WAY up there. Problem is, most of the somewhat affordable treatments that you can buy at stores are too short for homes with nine foot ceilings (that a lot of us have now). Even the regular 84" draperies are too short for eight foot ceilings because your drapes should at least hit the floor, if not "puddle" at least a bit. If your drapes are going to be operational, meaning you are going to close them for privacy or light control, you should go with a length that just hits the floor, or just a little bit of a break at the bottom.

Here is an example of just hitting the floor:


Here they are with just a little puddle, which I tend to favor:


Even though some places, like Pottery Barn, have lengths that will work, they don't carry a great selection as far as color or prints are concerned. Their treatments are beautiful, but a bit "vanilla." Not to mention, holy CRAP, they are expensive. So what do you do if you can't find the right length or design at the store?
MAKE YOUR OWN!! Stop laughing at me and listen. It really isn't hard! The best part about making your own window treatments is you can make them in just the right fabric that you LOVE.

All you need:
  1. Yardage of fabric that you need. For nine foot ceilings, you'll want about three yards of fabric for each side of the window. This gives you enough for hems.
  2. An iron. (See, I told you this was going to be easy!!)
  3. Hemming tape. You can find this stuff anywhere, even Target. I like the heavy duty type but even the regular will work for most fabrics. It looks like this:

    Get out the ironing board, and use your hemming tape to hem the fabric. Easy. as. pie.

If you are using a rod to hang the drapes, just fold over the top enough for the rod, and hem. If you aren't using a rod, you don't even need a rod pocket. Just hem the top and use the clips on the drapery rings to hang them.
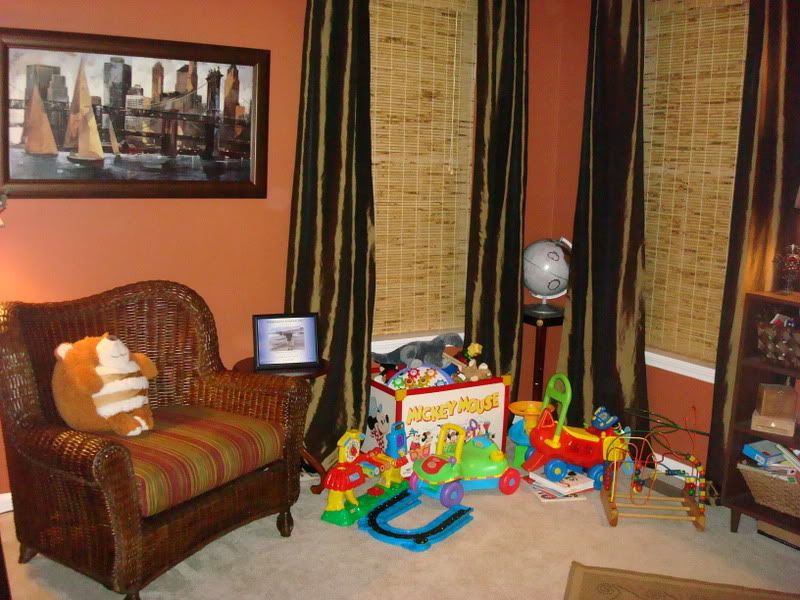
Here's an example of a set I did -- this was my first attempt at making my own (excuse the toys -- obviously the office is now the toy room!):
Photobucket
I even cut the width of the fabric in half, because I knew I wouldn't be closing them and didn't need enough to cover the whole window. So I made window treatments for two windows with only six yards of fabric. I had a coupon so I think I spent about $40 for the fabric. Hemming tape is about $3 for a package. Seriously...you can't get any better!!
Come on, you can do it!! :)

Saturday, May 24, 2008

More examples of my obsession

So now that I've explained how to add molding to your home, I thought I would share more ways I think it has transformed our house.

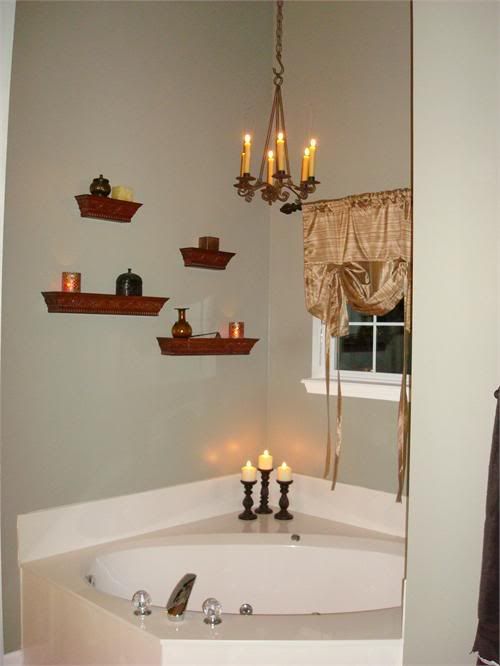
Our master bathroom is one of my favorite examples. We have extremely high ceilings that I painted with a mossy green color. After a while I realized how dark it was in there, but there was NO WAY I was repainting those walls again. I thought about adding tile around our tub, but figured it would be at least $1000 to do that. So I ended up using molding around the tub to lighten up the space.

Here is the before:

Photobucket


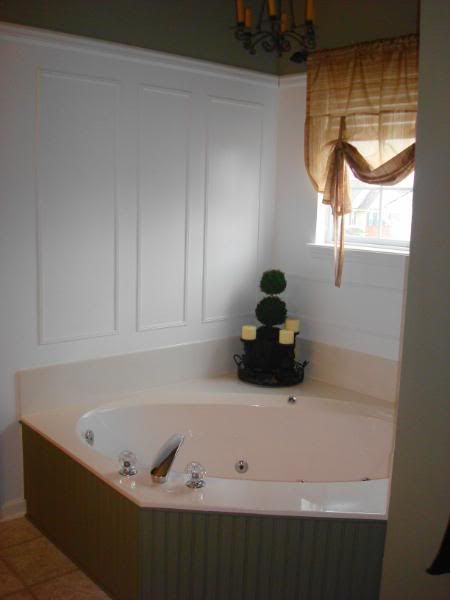
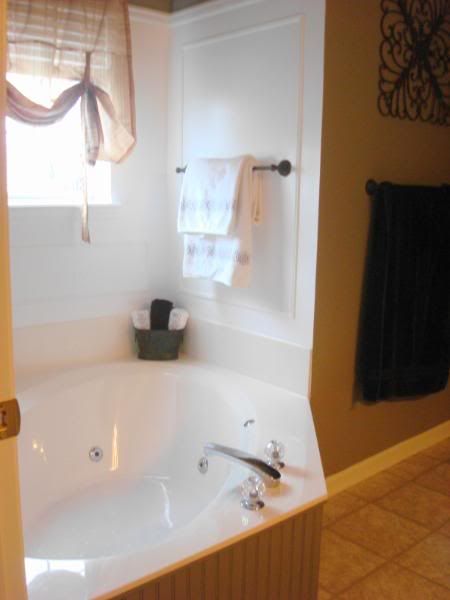
And here is it after, with the magic of molding! :)


Photobucket

Photobucket

I added rectangles to the walls around the tub with molding, a chair rail around the top and painted it all out white. Then I used beadboard around the marble base of the tub and painted it a shade darker than the walls.

The BEST PART! This whole project was $40! The molding is the only purchase I had to make -- the beadboard was leftover from another project and the paint I already had. You can't beat it! We'd still like to change out the tub fixtures, but that will be later -- for the plumber. :)

Friday, May 23, 2008

Beware of shopping buddies

One sure-fire way to NOT be a "thrifty decor chick" is to shop with your friends. What is it? The peer pressure, of "Ohhhh, just BUY it!" I think so. And we all do it. Then you compare totals while walking out of the store -- and when you spent less than your buddy you whisper "YESSSS" to yourself. :) (You know you do.)

All I know is I spend half as much on a shopping trip by myself than I do when I am with friends. And even less when it's just me and my little man. Nothing is better for the bank account than shopping with a toddler.

I will post more tomorrow -- the computer was on the fritz today.

Wednesday, May 21, 2008

Do they have a support group for me?

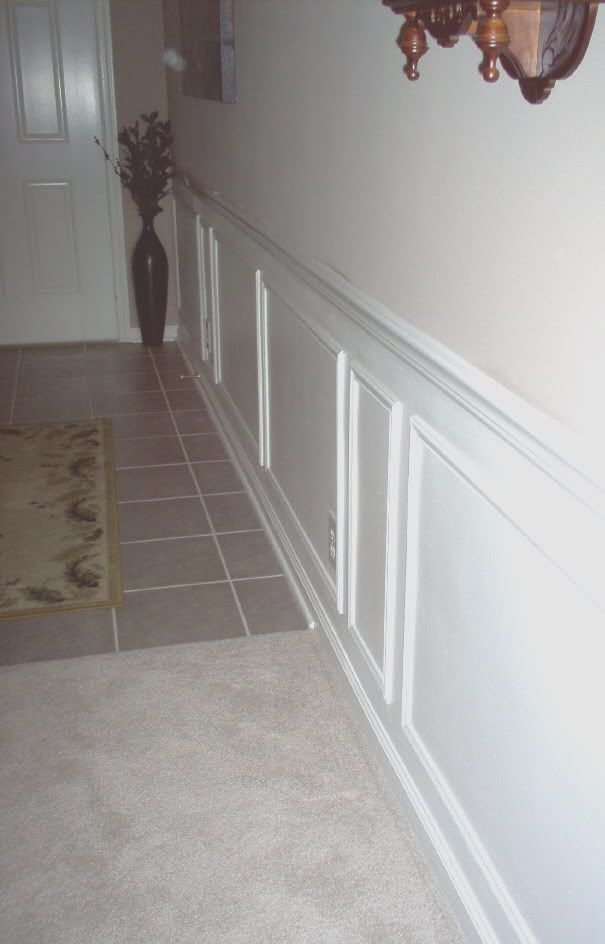
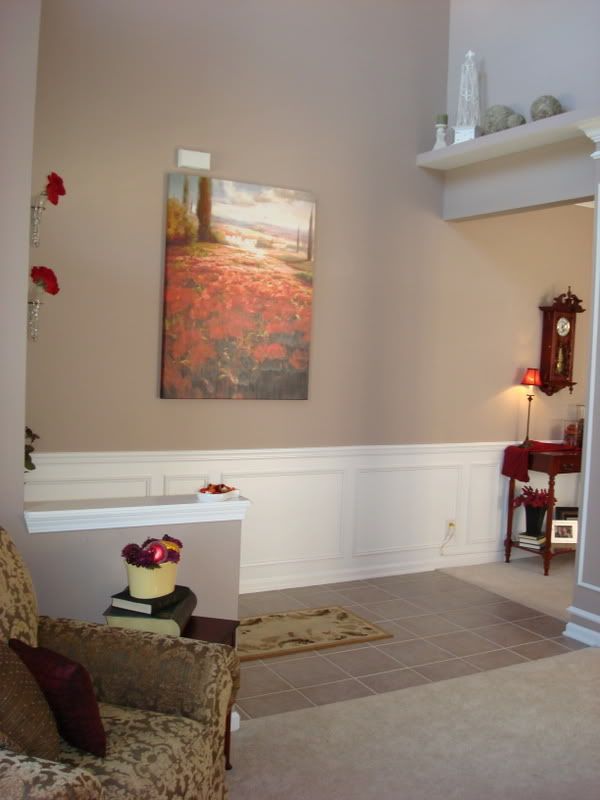
I am obsessed with molding in our home. I mean, seriously. Obsessed. I can't even remember the first project I did with it, all I know is I've always loved the look of wainscoting, beadboard and chair rails. So when we moved into our house, I set out to figure out how to do it on my own. I've gone from using an electric saw (REALLY REALLY not the best idea) to cut my wood and pounding in every nail with a hammer to now using my trusty miter box and a nail gun. The next level would be to finally just get a table saw to cut the wood, but even I'm not there yet.

Molding, I believe, is hands down the No. 1 way to update the look of your home. It makes it feel fresher, more customized and it sets your home apart from all the others in your neighborhood.

The greatest part about molding is it is easy to do. I'm not just saying this -- it really, really is. I was handy with a hammer before we moved into our home, but nothing else, so if I can do it, so can you. There are three main tools you need to install molding:
  • A miter box with saw. These come in a set for about $8 at any home improvement store.

  • A level. These vary in size and price, but all you need is a little one that will cost a few dollars.

  • A nail gun. I know, not quite as simple as the other two! If you don't have one, you can rent it from any home improvement store. They are SO simple to use -- just plug it in, let the air fill up the tank, and put the gun against your surface and shoot. It is FUN to use a nail gun. My first time I put about 20 extra nails in, for good measure. I just couldn't stop!
  • If you don't want to use a nail gun, just do what I did when I started out...nail every hole in. It takes longer but it works just as well. Use a drill bit to drill a hole for the nails though, because the wood may split if you just hammer the nail in.

Once you have your tools, it just takes measuring to see what length you want your squares. Use your miter box to cut the ends of the molding at 45 degree angles. That way, they match up in the corners to create a box. Make sure the wood is level before nailing in, and then go for it. I like to paint my projects white when everything is installed. It gives it a nice, crisp look. This is what I did to the island in my last post, but with black paint obviously.

Here's another example:

Photobucket

Photobucket

Once you do it one time, you'll be a pro!! The best part -- it's CHEAP. The molding is typically comes in 8 foot sections and these run anywhere from $3 to $10 a piece. So you can transform your room, stairway or hall with around $25 to $100, depending on the project.

Tuesday, May 20, 2008

Laminate is indestructible.

This project is a PERFECT example of the need for patience when working on projects in your home. This is something I have very little of when I get on a roll.

The new look in kitchens is two tones for wood cabinets -- for instance, cherry cabinets and a black island. Depending on the room and the wood tones, I think this can be beautiful. The other night, I was watching an HGTV show and they covered the back of an island with a ratan rug -- it gave it texture that was interesting.

Dangerous. I start looking at our kitchen...thinking of how everything kind of melts together...the cherry cabinets, cherry table and chairs (I'm working on that one), cherry floors and cherry island. I thought, how great would a black island look? I'll add molding to it (an obsession of mind, as you will soon see) and paint it black! Brilliant!

Well, I thought I had planned it out well. I knew the laminate they make the sides of the island out of would not hold paint well. So I got the sander out, got the right grit sandpaper, planned out my painting... So I sanded and painted. When I sanded the first coat, it rolled right off. Gah. So I sanded again. And again. And. Again. Gave up, got the liquid sandpaper. It seemed to work great -- I painted again. And I go to paint the final coat and paint was literally rolling off in my hands. I mean, really.

At this point, I am over this project in a big way. I painted it one more time and will just have to see how it holds up. If it doesn't...I'm calling in the professionals.

The moral of this story is...TAKE YOUR TIME. Do it right. And USE PRIMER!!!

Here is the before:

And here is the after:

The best part -- this was a $30 project:

  • $24 for the molding materials
  • $6 for liquid sandpaper
  • black paint was leftover from another project

Where do I begin?

I really can't quite believe I'm actually starting a blog!! Before two years ago, I had no clue what chat boards were, what "posting" was, and what "dh" stood for. (That would be "dear husband.") But then I got pregnant, and every little twinge sent me flying to the computer to search what ailed me. This, we all know, is not a good idea. But since then I have also found the Internet to be a valuable resource for decorating ideas as well. There are sites I have become quite obsessed with that I will share with you along the way.

I have enjoyed home decor in all it's forms for years, and recently followed my dream and became an interior decorator after our son was born. It truly has been a dream come true. Although my clients spend thousands, and that is VERY fun, I have always found it much more fun to accomplish something fantastic on a budget. And even though we could probably afford to spend more than we do on our decor in our home, I find it so much more rewarding to do it on a budget.

So that brings me back to the blog -- I want to share my thrifty ways with all of you. Whether it is doing a project yourself (you really, really can do it, I swear!) or sharing the best places to find great stuff for a steal, I thought this blog would be the perfect way to pass on the information.

I hope you find it helpful, and be patient with me as I start on my latest project...this one does not require power tools...thank the Lord.
 
coompax-digital magazine